Connecting QuickBooks Online to IntelliTrack
Important: Before using the Plugin to integrate with QuickBooks Online, you must first authorize IntelliTrack to connect to your QuickBooks Online company.
Connecting QuickBooks Online to IntelliTrack is a two step process.
- First, you must connect QuickBooks Online to IntelliTrack.
- Second, you must authorize IntelliTrack to share data with QuickBooks Online.
- After QuickBooks Online is connected to IntelliTrack and has been authorized to share data with IntelliTrack it may be connected in the Plugin.
Connection Steps
To connect IntelliTrack and your QuickBooks Online company and authorize IntelliTrack to share data with QuickBooks Online follow the steps below.
Important: You must connect the QuickBooks Online Company to IntelliTrack BEFORE configuring it in the Plugin.
- Log into the IntelliTrack web application.
- Select Tools > Connect to QuickBooks Online from the navigation pane.
- The Connect to QuickBooks Online page appears.
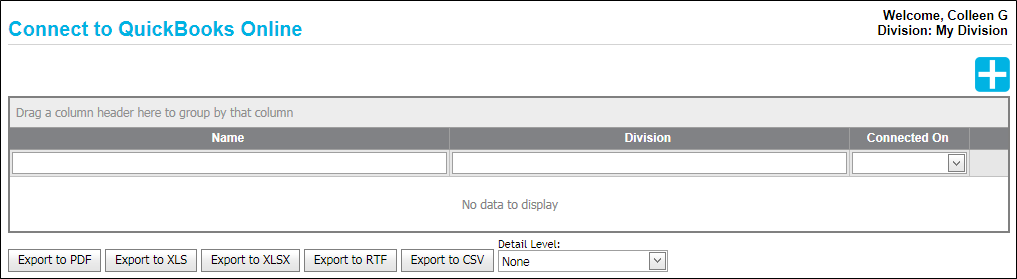
- Select the Add button
 .
. - A Connect to QuickBooks button appears under the page’s grid. Click the Connect to QuickBooks button.
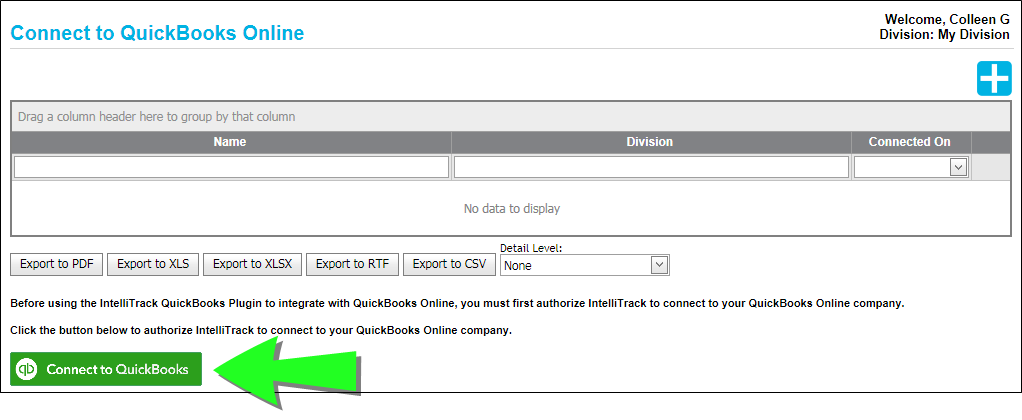
- The Welcome to Inuit App Center form appears.
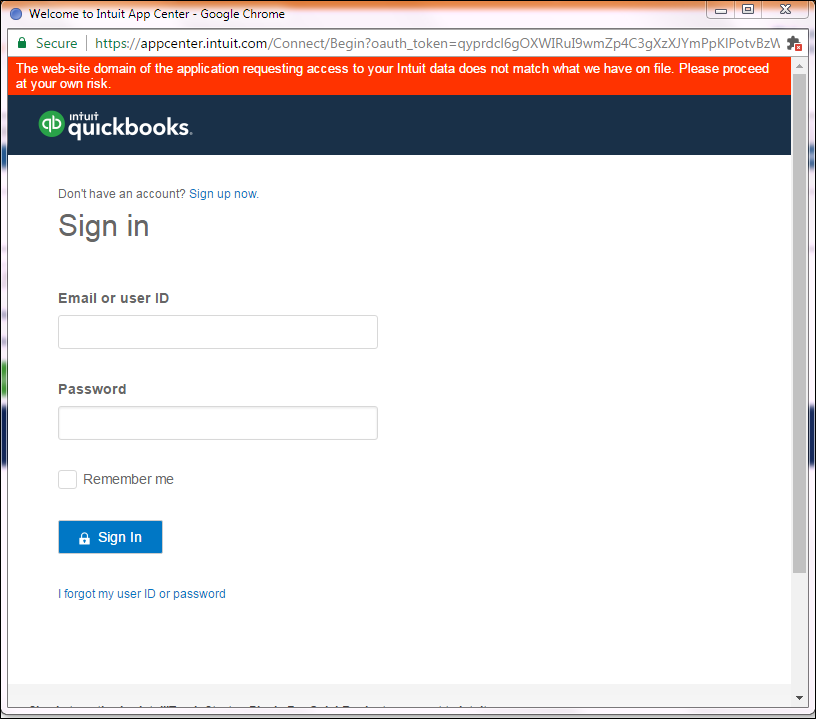
- Sign in to authorize this connection. Enter your QuickBooks Online account at the Sign In form and then click the Sign In button.
- A form appears that lists your QuickBooks Online company. Select the company that you want to connect to.
- After you select the company, another form appears. It asks you to authorize the sharing of your data.
- Click the Authorize button to allow data sharing.
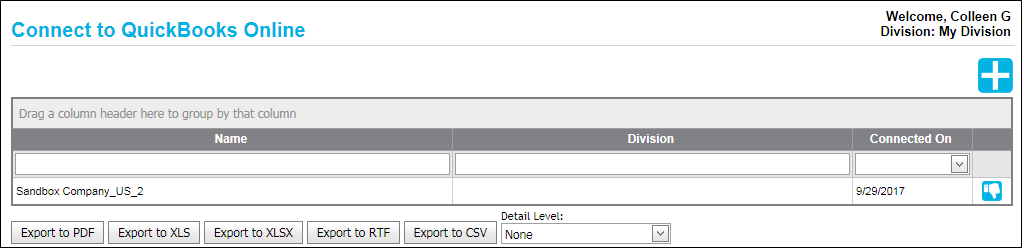
- When the authorization is granted, the form closes and you are returned to the Connect to QuickBooks Online page.
- The QuickBooks Online Company has been added to this page, indicating that the QuickBooks Online company is connected to IntelliTrack. It is now ready to be configured in the QuickBooks Online Plugin.
IntelliTrack for QuickBooks Online Configuration Options
Before configuring the QuickBooks Online Company in the Plugin, you must at a minimum set the IntelliTrack settings in the Basic Configuration tab; see "IntelliTrack for QuickBooks Online Configuration Options" for more information:
- Default Division
- Default Site
- Default Location
- Default UOM
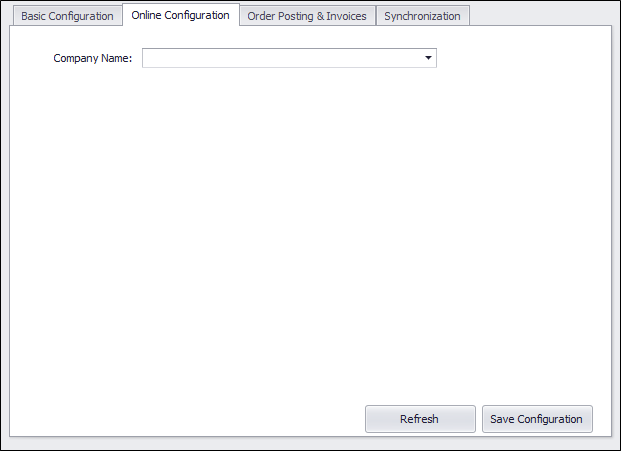
Online Configuration Tab
Important: AFTER you connect IntelliTrack to the QuickBooks Online Company and set the Basic Configuration settings for the default IntelliTrack division-site-location-UOM, you are ready to perform the online configuration.
One QuickBooks Online company at a time may be connected in the Plugin. Follow the steps below to configure the QuickBooks Online Company in the Plugin.
- Open the Plugin Host Utility.
- The Basic Configuration tab is to the front. Make sure that at a minimum the IntelliTrack Settings are in place:
- Go to the Work Area of the screen and select the Online Configuration tab to bring it to the front.
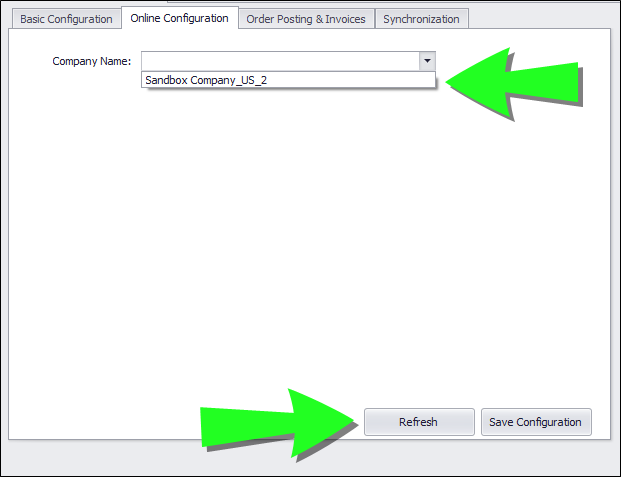
- Click the drop-down arrow in the Company Name field.
- The QuickBooks Online Company name or names that are connected to IntelliTrack at the Connect to QuickBooks Online page in the IntelliTrack web application should be listed in the drop-down list option.
- If you have connected the QuickBooks Online Company to IntelliTrack, and it is not available in the Company Name drop-down list, click the Refresh button to retrieve QuickBooks Online connection settings from the IntelliTrack database.
- Select the QuickBooks Company from the drop-down list so that it appears in the Company Name field.
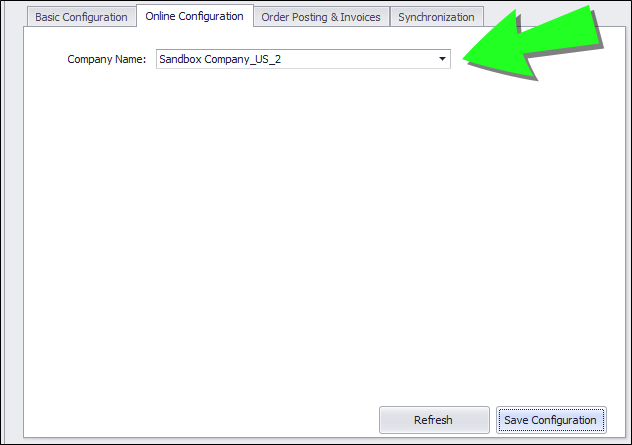
- Select the Save Configuration button. A message appears in the status bar along the bottom of the Plugin: Saving QuickBooks Online settings. When the settings are saved, the message Saving QuickBooks Online Settings Completed appears.
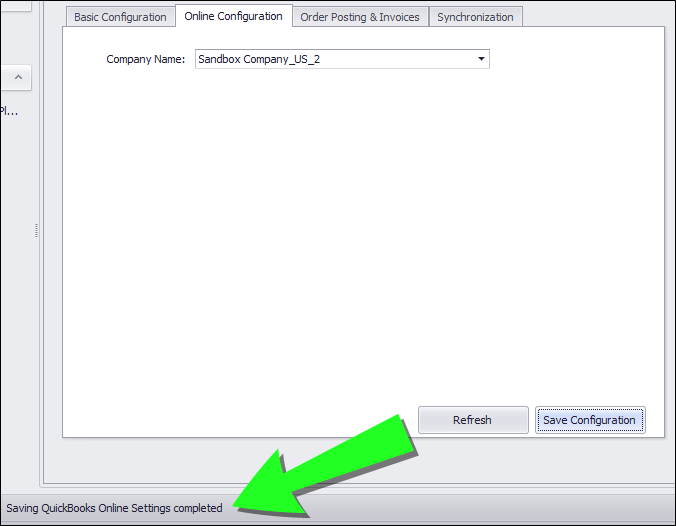
- The QuickBooks Online Company is now configured in the Plugin. This means that when data is synced, the information from this QuickBooks Online company will be shared with IntelliTrack.